Running an experiment on EdgeNet
If you are familiar with Docker and Kubernetes, you already know almost everything that you need to know to deploy experiments on EdgeNet. If not, you can rely on the wealth of documentation and tutorials already available for these technologies online. This page describes the basic steps required to run an experiment on EdgeNet, with attention to the few EdgeNet-specific features: user registration, user namespaces and selective deployments.
Register for a free account
We welcome bona fide researchers and instructors whose work will benefit from a global testbed that is open to the Internet. Its value lies in its distributed vantage points rather than in raw compute power. Kindly review the Acceptable Use Policy for more details.
To run experiments on EdgeNet, you need an account that you can obtain for free by signing up on the landing app (the web console is under construction):
Please provide an institutional e-mail address. EdgeNet administrators will verify the information that you provide and, if all checks out, you can download your kubeconfig file or access the Kubernetes dashboard via the landing app, at which point you can start using the system.
If you work as part of a team that has not yet signed up, please start by registering an account for your team leader (with their agreement, of course). Once that person is approved by the EdgeNet administrators, they will be able to authorize accounts for all those for whom they are prepared to take responsibiity. The team leader does not need to be familiar with Docker or Kubernetes; they can perform all authorizations via the web console, and they can delegate authorization responsibility to a team member.
Users at not-for-profit institutions
For researchers at not-for-profit institutions, including universities, research institutes, laboratories, and government, EdgeNet administrators will verify a researcher’s status, for instance by checking for their publications.
We welcome instructors who wish to use EdgeNet for laboratory exercises for their classes. An instructor who is a team leader can authorize student accounts, for which they take responsibility. Verification of your status might require e-mail exchange with edgenet-support@planet-lab.eu.
If you are a student or intern, please ask your supervisor to register themselves, or to allow you to register them. They can then authorize your account.
All users of a team’s account free account share that team’s limited quota. That quota can be automatically increased if the team contributes nodes to EdgeNet, either from their institutional premises, team members’ homes, or from the cloud; it takes no more than five minutes to do so. Those unable to contribute nodes can ask edgenet-support@planet-lab.eu to nonetheless consider a quota increase.
Even if your limited quota is sufficient, but you find that EdgeNet proves to be valuable to your research, we do ask that you kindly support the platform through node contributions.
Users at for-profit institutions
EdgeNet welcomes pre-commercial research conducted by individuals at for-profit institutions. You may obtain a trial account with a limited quota for free. Verification of your status might require e-mail exchange with edgenet-support@planet-lab.eu. Quota increases can be obtained as described above for not-for-profits.
If EdgeNet proves to be valuable in your work, we ask that your institution kindly make a financial contribution to support the platform.
Prerequisites
To run an experiment, you need to have Docker and kubectl installed on your machine. You can find the installation instructions on their respective websites. You will also need a free account on Docker Hub to store your container images.
Building a container image
Let’s consider a simple scenario where we want to serve a static web page. We will define two files in simple-experiment directory: the web page index.html, and the Dockerfile.
simple-experiment/
├── Dockerfile
└── index.html
The index.html file contains a minimal HTML page:
<!-- index.html -->
<html><body>Hello World!</body></html>
The Dockerfile contains the instructions needed to build the container image. We will use Python’s built-in web server to serve the page. Start with an image from Docker Hub that has Python pre-installed:
# Dockerfile
FROM python:latest
ADD index.html /data/index.html
CMD python3 -m http.server -d /data 80
We can then build and test our image locally:
docker build -t simple-experiment .
docker run -p 8080:80 -it simple-experiment
curl http://localhost:8080 # (In another terminal)
# <html><body>Hello World!</body></html>
Once we’ve tested our image, we can tag it and push it to the Docker Hub registry. To do so, first create a repository on Docker Hub:
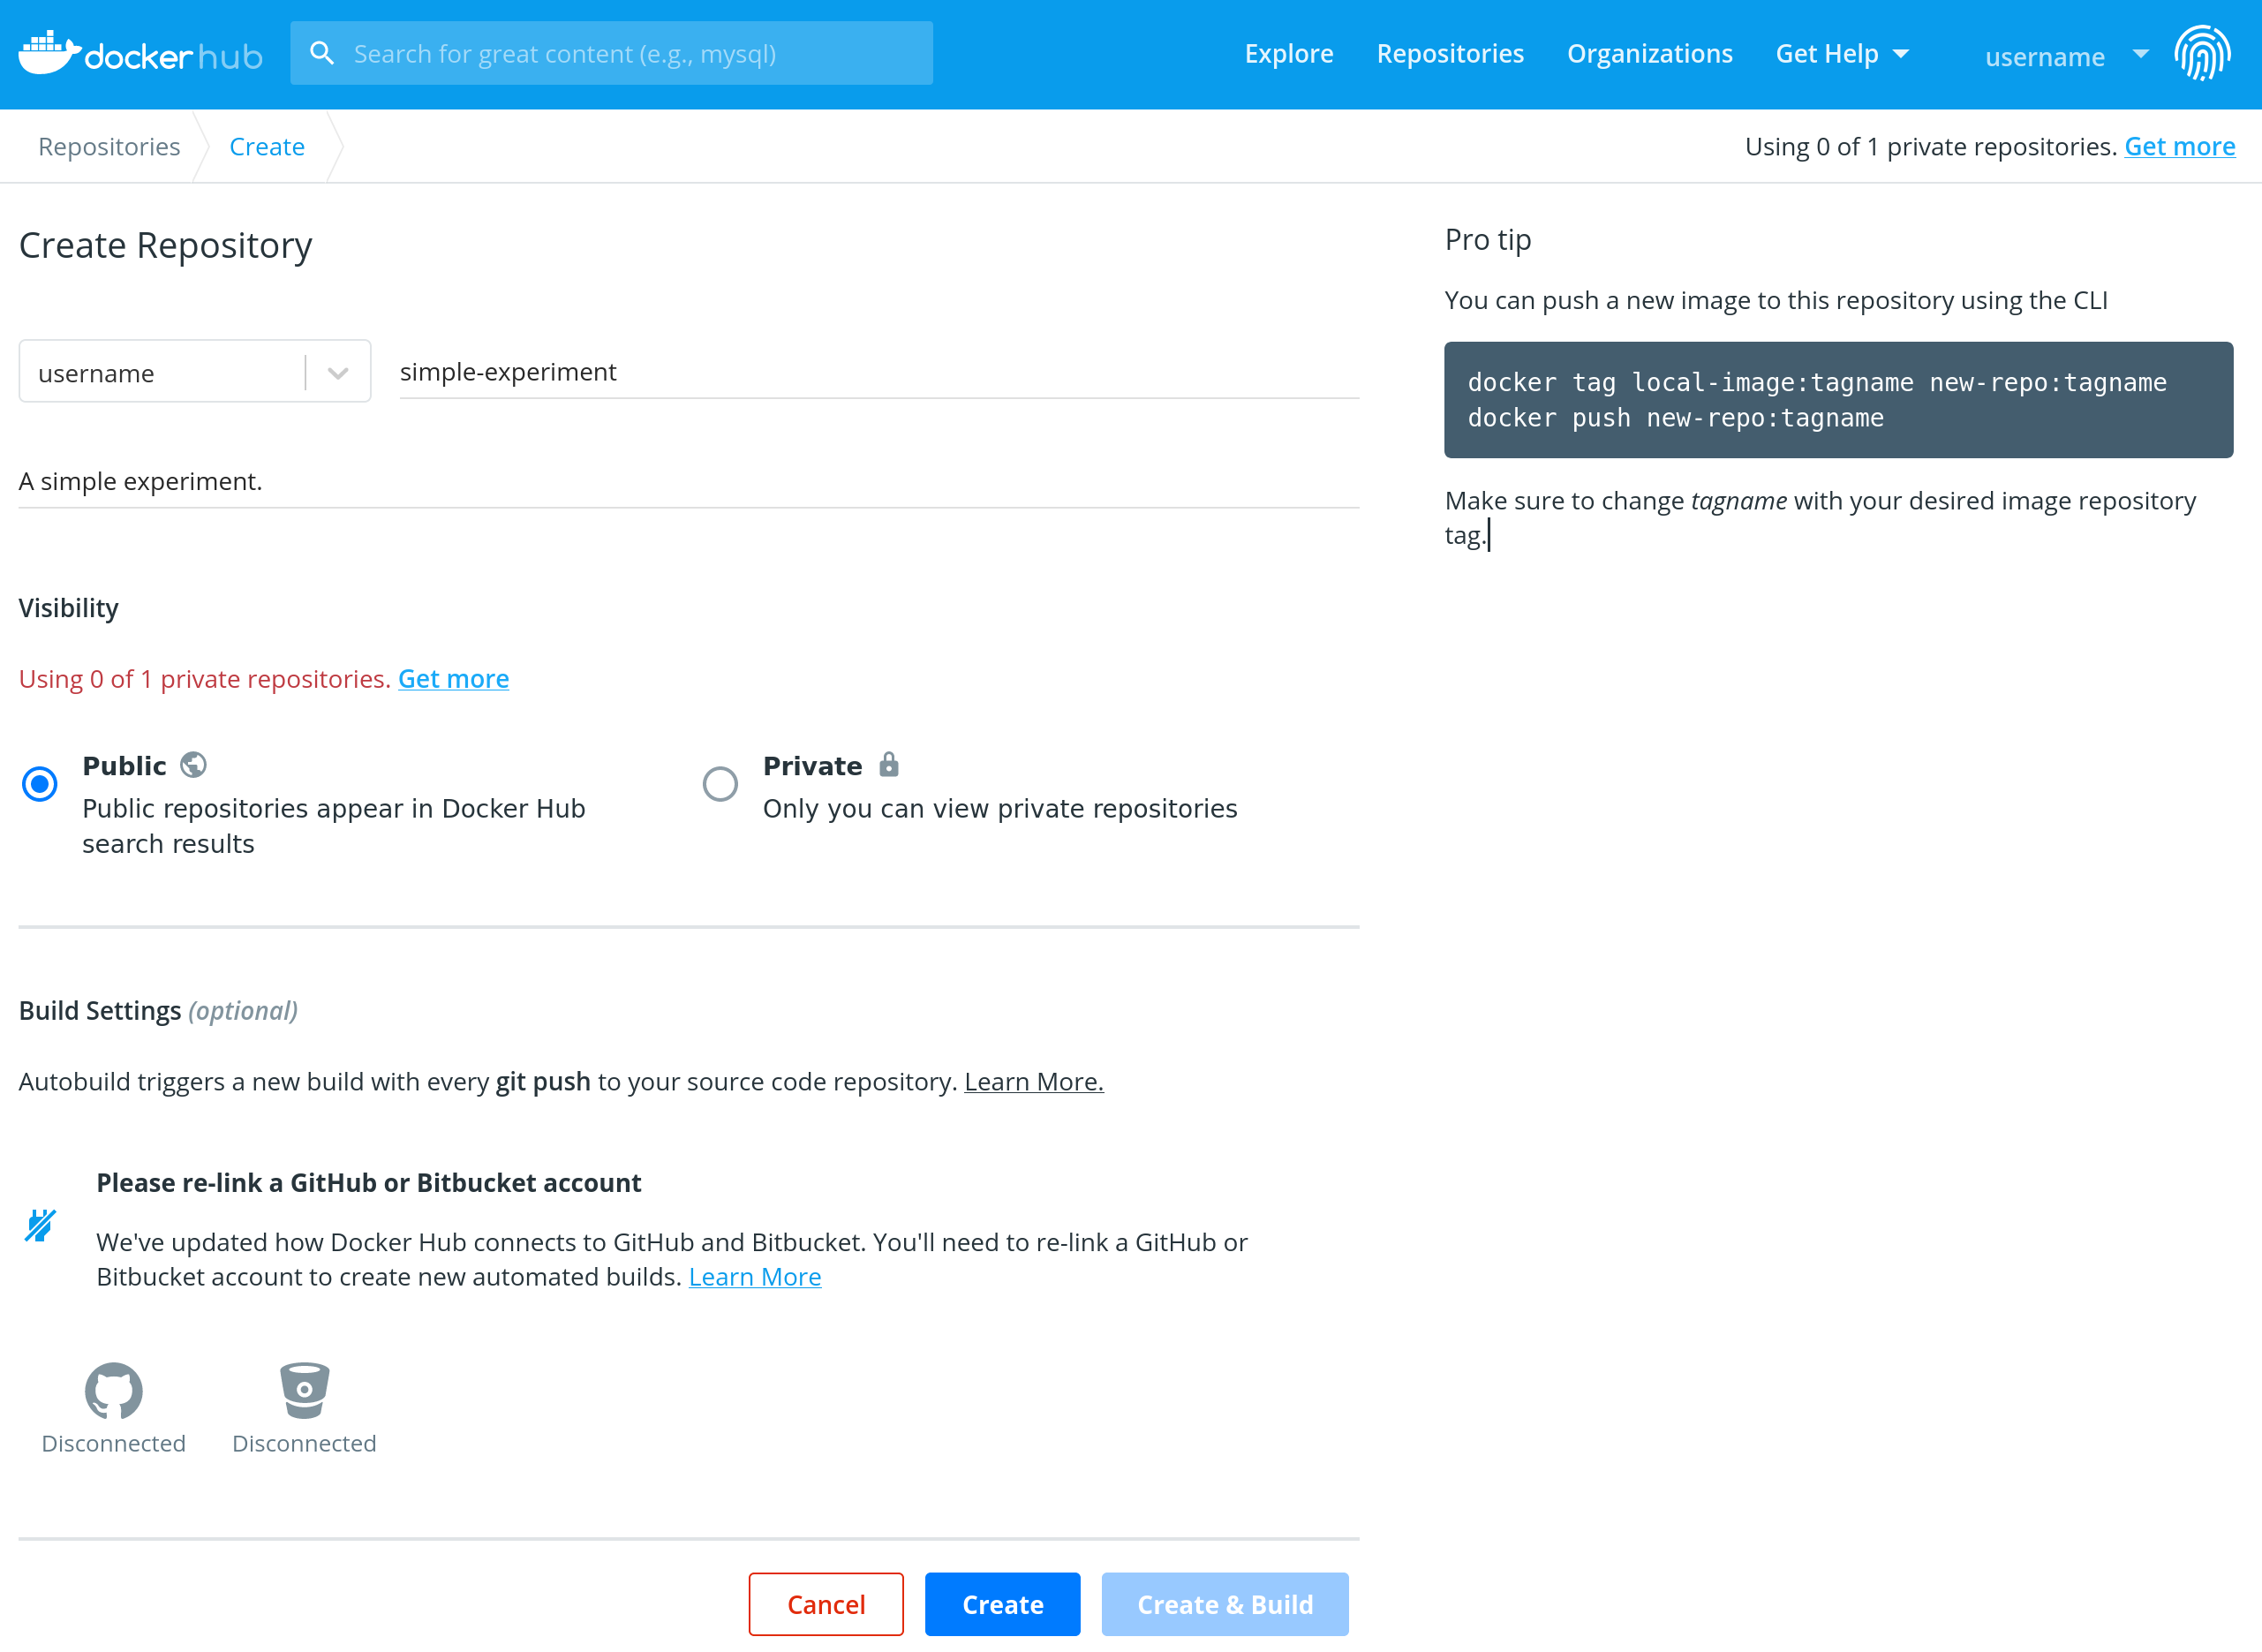
Then run the following commands, replacing username with your Docker Hub user name:
docker login
docker tag simple-experiment username/simple-experiment:1.0
docker push username/simple-experiment:1.0
CPU architecture
EdgeNet supports both nodes with ARM64 and x86-64 CPUs. If the binaries in your image do not match the target node architecture, it will fail to run with the message: exec user process caused "exec format error". For example, if you build a C++ program in your Dockerfile, this program will by default be compiled for the architecture of your machine: If you’re running Docker on an Intel MacBook, it will produce an x86-64 binary, while if you run it on an M1 MacBook, it will produce an ARM64 binary.
Docker also supports building multi-architecture image on a single machine, by emulating the target CPUs architecture. The following tutorials provides more information:
- Building Multi-Arch Images for Arm and x86 with Docker Desktop
- Continuous Cross-Architecture Integration with GitLab
Deploying containers
Creating a deployment
Here is an example deployment.yaml file:
# deployment.yaml
apiVersion: apps.edgenet.io/v1alpha
kind: SelectiveDeployment
metadata:
  name: simple-experiment
  namespace: your-tenant
spec:
  workloads:
    daemonset:
      - apiVersion: apps/v1
        kind: DaemonSet
        metadata:
          name: simple-experiment
          namespace: your-tenant
          labels:
            app: simple-experiment
        spec:
          selector:
            matchLabels:
              app: simple-experiment
          template:
            metadata:
              labels:
                app: simple-experiment
            spec:
              containers:
                - name: simple-experiment
                  image: username/simple-experiment:1.0
                  ports:
                    - containerPort: 80
                  resources:
                    limits:
                      cpu: 100m
                      memory: 125Mi
                    requests:
                      cpu: 100m
                      memory: 125Mi
  selector:
    - value:
        - North_America
        - Europe
      operator: In
      quantity: 5
      name: Continent
And here is the command to launch it (provide the correct path to your kubeconfig file):
kubectl --kubeconfig /path/to/kubeconfig.cfg apply -f deployment.yaml
Monitoring the experiment
These commands allow you to find the pod names and to forward the container port. We omit the --kubeconfig and -n options for brevity here.
View the selective deployment (sd) status:
kubectl --kubeconfig /path/to/kubeconfig.cfg -n your-tenant \
    describe sd simple-experiment
View the daemon set (ds) status:
kubectl --kubeconfig /path/to/kubeconfig.cfg -n your-tenant \
  describe ds simple-experiment
View the logs of a pod:
kubectl --kubeconfig /path/to/kubeconfig.cfg -n your-tenant \
    logs POD_NAME
Forward the ports of a pod:
kubectl --kubeconfig /path/to/kubeconfig.cfg -n your-tenant \
    port-forward POD_NAME 8080:80
Stopping the experiment
kubectl --kubeconfig /path/to/kubeconfig.cfg delete -f deployment.yaml
Tips
To avoid passing --kubeconfig on each command, you can copy your kubeconfig file to $HOME/.kube/config, or export the KUBECONFIG variable. For example, export KUBECONFIG=/home/user/Downloads/kubeconfig.cfg.
To avoid passing -n/--namespace on each command, you can use a tool like kubectx.
Going further
For more information, please refer to the Docker and Kubernetes documentation.